Portuguese windmills
As you can see by the pictures most windmills in Portugal were of the same design single tower and canvas sails rather than wooden sails found on other windmills in Europe.
For this project I'm going to use a large cardboard tube, for the tower and cover it with air dry clay for the texture. For the roof I'm going to use card tiles, and for the sail struts I'm going to use what i can find.
For this project I'm going to use a large cardboard tube, for the tower and cover it with air dry clay for the texture. For the roof I'm going to use card tiles, and for the sail struts I'm going to use what i can find.
starting point the cardboard tube cut to size with the help of a 60th rifleman to test the scale.
tube covered with a layer of air dry clay
To get the right texture of the stone, i have found the best way is to use a stone to mark or stab the clay this gives it the right look
Next i cut out the door and windows and using a blunt pencil i drew in the stone work. I found that after i had finished with the detail the clay had expanded due to me working on it, and it had become lose around the tube, so i cut the overlap off and gave the cardboard tub a coat of PVA glue to help the clay to stick to the tube. Once this work is done leave to dry mine took about 12 hours to dry.
With everything dry i have painted in the windows and doors and added the roof. i have also added a base at this stage to give the structure strength.
At this stage a quick look at the pictures as i wanted to see how the sails are constructed and attached to the mill.
Roof tiles attached not the most easiest of things to do but it gives the right effect.
first coat of paint on the model plus i have washed the stone with a ink wash
Two coats of dry brushing each one giving a lighter finish
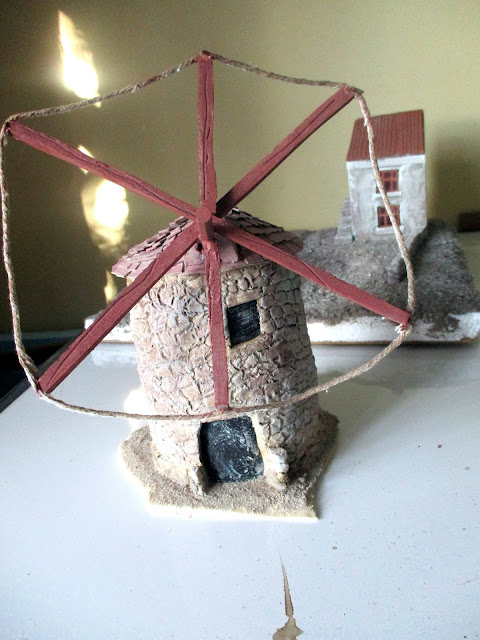
The sail struts are attached to the mill I'm not going to attach sails to the mill.
Sail struts base coated and the string given a ink wash
The finished mill with the struts high lighted and the door and window details painted in.
all ready for the skirmish of Rolica.
Hope this has been an interesting look at windmill construction. Next up on the terrain building is some villages for the battle of Rolica. Till next time


No comments:
Post a Comment